What BOOKS did you like best?

Monday, September 9, 2013

Remember to check out your local thrift store

    Hello everyone!
I went to a thrift store over the weekend while looking for Halloween things, and I ended up buying a giant decorative Japanese fan, and these:


I think they are food magnets, because they come with a small magnet, but the directions are in Japanese so I just used pictures to do this.
The materials came like this...
And turned...
Into..
THIS!!!
 This says "Gift for you"
And I think it came out pretty good. I think the best one is the one that has a powder that looks like crushed almonds on the left, then the gold thread that looks like gold leaf or something with a "chocolate" heart <3, and finally, ( the one I made that got stuck in an awkward stage...) white chocolate bands around the edge.
   My favorite one is the heart one~ ( Shh..! Don't tell the others!)

   I'm making the fish one (from the first picture) and the directions are even MORE confusing.   *Ahem..* The directions are in Japanese. The PICTURES are even more confusing. I'll post it when I'm done~

So for now...
Ja Mata~ ... (It means bye!)

Thursday, August 22, 2013

Hey! Random stuffs~

    Hi people,
( explanation for vocabulary is at the bottom~) I know it's been awhile but...

So since I haven't posted a project lately, I have decided to...
COSPLAY*
I am an anime* lover. An otaku. ( an anime nerd.) So lately, I will just go to a store to buy grocery's like usual. EXCEPT...
I wear a cosplay wig.
And I go out in public.
 And I watch people stare and the like. I started doing this a couple of days ago, and it's quite fun. Some people complimented me. One guy said "You're awesome. Keep rocking.", and just walked away. It's really amazing when people have the courage to talk to a stranger. So I came to talk about my cosplay wig but...


OOOOkay. Starters for self-esteem.
1. Don't care what anyone thinks if you want to be yourself. I AM NOT SAYING TO DO NOTHING AND BE LAZY. I AM SAYING, IF  YOU WANT TO BE PEPPY, BE PEPPY. IF YOU WANT TO BE GOTH, BE GOTH. DON'T FOLLOW TRENDS BECAUSE YOU WANT TO "~fit in~".  Just be yourself.
2. If people try to drag you down for being "weird", ignore them. Being "weird" is fun. Don't let them judge you for that.
3. Whatever you do, DO NOT, I REPEAT: DO NOT BEAT YOURSELF UP FOR NOT FITTING IN. WHO CARES?!? Not me. I do not care if you fit in.
//Bonus~//
Don't be mean. Because that is horrible, and just never do it.

* cosplay- dressing up as a character from a movie, T.V. show, anime, manga*, video game, ect. Dressing up for a contest, convention or just for fun.
* anime- Japanese cartoons, usually based on manga.
*manga- Japanese comic books.
Okay, so I don't really have anything else to say. Sooo...

>//U//<

Bye bye~

Monday, July 15, 2013

Honey~Lemon

Hi everyone~
   I'm back! I'm happy that I didn't take a long time to post this time! I made something called a "Honey-lemon drink".  I got this recipe from YouTube, a post by Ochikeron, and I really love her videos! You can look for this video on YouTube because I'm having problems attaching the video.... >///^///<
Please subscribe to her! I also updated the format of my blog, I hope it's easier to navigate now!
(by the way, this is for people with VERY sweet taste! Make sure to test the drink before adding more mix!)

Honey~Lemon drink/ slices

  • 2 lemons
  • 10.6 oz bottle of honey
  • a jar
  • knife
  • cutting board
  • ( for the lemons slices) plastic wrap
  • boiling water
  • a large pot


  1. Gather ingredients.
  2. Boil some water in a pot.
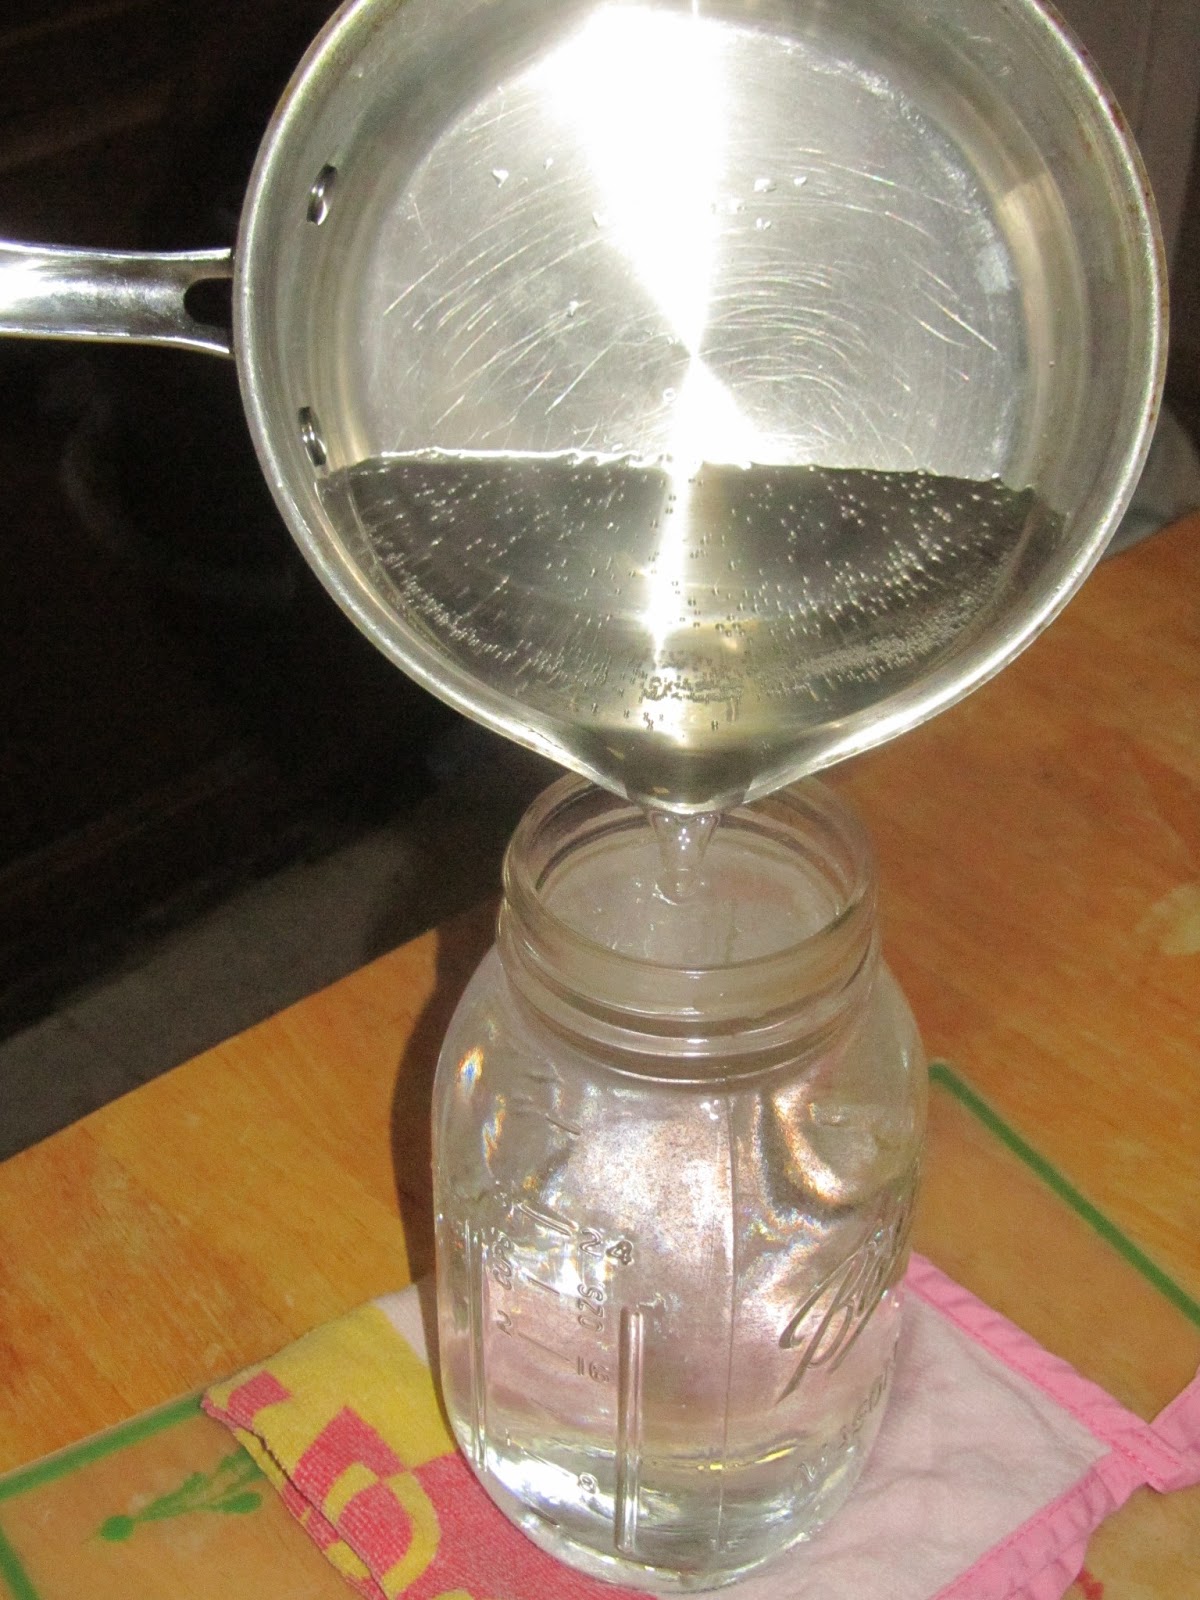
  3. Fill the jar with boiling water and pour then the water out (to sanitize the jar).
  4. While the jar is drying, cut the lemons into thin slices. !!!REMOVE LEMON SEEDS!!!
  5. When the jar is dry, pour a little honey in the center of the jar; then layer 4 slices of lemon on top.
  6. Then alternate putting honey and lemon in the jar. (I first layered honey at the bottom of the jar, but you can layer lemons if you like.
  7. Keep alternating the honey and lemon until you run out of lemon.
  8. Pour the leftover honey on top of the lemon slices.
  9. Put the jar in the fridge. Keep the jar in the fridge for 3 days, and shake once a day.


~ 3 days later~

  1. Shake the jar 1 more time.
  2. Make a glass of hot/cold water ( depending on the weather).
  3. Pour some of the honey~lemon liquid into the glass of water ( taste the water when you add the mix because it is extremely sweet)
  4. Add as many lemon slices as you want.
  5. Wrap the lemons to save for later because they turn bitter if they are in the mix too long.

^///U///^ 

See you next time and enjoy~

Monday, July 1, 2013

Rainbow milk

Hi! I'm so sorry that I haven't posted in a looooong time! More blogs to come. Here's a summer experiment called, "Rainbow milk", But DO NO DRINK THIS!

Here's the materials that you will need:

  •  Whole milk
  •  Dawn dish soap 
  •  A small bow to pour a little soap in
  •  Food coloring
  •  plastic disposable plate
  •  At least 1 Q-tip


1. Pour the milk into the plate until it is completely covering the bottom of the plate.


2. Wait for the milk to settle, it shouldn't be moving

3. Add 3-5 drops of food coloring to the milk in separate areas of the plate


4. Dip the Q-tip in the soap and wipe off the excess soap on the side of the bowl


5.  Slowly lower the Q-tip into one of the dots of food coloring (it helps count down from 10), and leave it there and be amazed. Repeat this with each dot of food coloring.


I'll post another one soon....bye for now.

Thursday, February 21, 2013

Clouds of Clean!!!

Hi everyone,
      I am SOOOOO sorry this is late but I still did make a activity at the last minute...( actually I made it like a week ago but I didn't have any time to take pictures... Or post it...)


Okay, first order of business, I am taking sewing class at a place called Kuni Island Fabrics and it is an AWESOME sewing class! Thank you Kuni! You guys taught me how to actually use a sewing machine!!! ( I really have one, but I had- still have- no idea how to use it. :D  ) I wanted to show everyone how the finished product looks like.

This is an iPad case, I have an adorable red button and I completely forgot to remember to sew it on until now, but I can do that later.


The craft I have planned is a kids dream, blowing stuff up in a microwave. Now parents, do not be afraid. This is soap, it will turn into a big fluffy cloud of soap( only Ivory brand bar soap) . Supervise your children and WARNING: THIS IS AN EXTREMELY FUN PROJECT.  JUST DO NOT DO IT FOR TOO LONG. 
 You use only 3 things!

1. Microwave 
2. Ivory Brand bar soap
3. Wash cloth or Paper towels

steps
1. Put the cloth or towel inside the microwave.
2. Put the bar of Ivory soap on top of the towel.
3. Close microwave door and microwave for 4 minutes but watch very carefully, the soap will become a very fluffy cloud and you need to stop the soap from rising to the top of the microwave. I most likely will not take 4 minutes to fluff, but when it is done becoming a cloud, stop the microwave and let it cool. The cloud will deflate a little, but if you stop the cloud in the making enough, the deflating will stop
4. Remember to let the cloud cool down from 5-10 minutes for it to harden. The microwave will smell like the scent of soap you used so just keep the microwave door open for about 5 minutes and it won't smell like soap anymore.
5. MOST IMPORTANT STEP- HAVE FUN!!!


Also this is SO not wasteful, you can still use the soap and the soap still works, it is just oh, I don't know, about 20x bigger!

Thank you everyone/ faithful readers ^  ^  !
                                                            ~ ~
                                                              ()

Friday, January 25, 2013

       Okay, I know this is a little late, but people had trouble leaving a comment I will tell you how. Hopefully this will help!
                                                        ^   ^
                                                           *
 1. Go to the bottom of 1 blog entry like the other one before this.
 2. Click either "no comments" or the number of comments like "2 comments".
 3. Type your comment in the box and then press the " Select Profile" and use a profile.
 4. Click publish!!!

          Oh, and here is a cute ( slightly emotional)  text...
                                   
                             T^T    Just press shift and t to makeT then shift and 6 to make ^ and then another T                         T^T
                                                                ^    ^
P.S.  to make cat ears do 2 ^'s above     T^T 
I will give you another week, so you can vote until next Friday.  Goodbye!Don't wanna go!              
                         ^     ^
                          T^T

Monday, January 14, 2013

Another Poll

Hi,
   This is another poll... If you want/ will allow me to have adds on this site, say "Yes 4 adds" in the comment box. If you say no, type" No Adds" in the comment box.
1. Pro & 1. Con
Pro I will earn money when people see my blog to buy more crafty things.
Con There will be adds on some parts of the screen.
Please write your comment!I will total the votes next Monday and post it on Monday or Tuesday.

Just a Random Thought...

Hi people,
    I just thought I should tell you guys/gals about my vacation. One of the places I visited in North Carolina was some place called "Hiddenite Gems inc. Emerald Hollow Mine". It was really fun and the thought of being able to mine for gems is an exciting one. There are 3 choices you can choose to mine. 1 is sluicing which is pretty much panning for gems, like gold panning. Another 1 is creeking, the same as sluicing but in a river and you get your own rocks,pebbles,and gems. The last one is "digging", this is mining, but I do not have any firsthand experience... I only did creeking and sluicing.
    I also thought you might want to watch a documentary on food/heath called "Hungry for Change", and it is about what really is in food. Something I thought was interesting that I learned was that most people check the fat content in foods but the sugar is the problem... I have a very LARGE sweet tooth!!! ;D If you want to watch it it is in Netflix and probably in DVD/ movie rental stores.


This big rock in the upper-left might be filled with gems or quartz, should I break it? I will make a poll maybe around next Friday. Cast your vote in the comment box!
 
              I hope no one has the flu! :)
That's all for now! Bye!

Saturday, January 5, 2013

Snow Nails!!!

Hi everyone,
 Merry ( late) Christmas and Happy ( late) New Year!!! I haven't posted in a while because I was in North Carolina for Christmas and the New Year. I mean't to post this a week before Christmas, but I was packing for NC... You can use this in a late Christmas party or a late New Years party.
   Okay, for this project you will need-

  • nail polish ( preferably white but any color will do if you coordinate the color of the polish with the gems/glitter) Do NOT use Essie nail polish because it is very light. California colors is a good brand.
  • nail gems or safe body glitter ( I used nail gems)
  • top coat * ( optional)  
  • Q- tips or cotton balls
  • nail polish remover
  • nail file * ( optional)
  • nail clipper * ( optional)
  • cuticle cutter/trimmer * ( optional)
1. Gather all your materials.


2. Prep your nails by clipping, filing,buffing, cutting your cuticles, or polishing your nails. ***


3. Paint your nails with the nail polish.

4. While your nails are still wet, apply glitter by using the wood stick it comes with or if you are using gems, dip your nails into the little jar the gems come in or put the gems in a small shallow bowl or plate. If you made a mistake just use the nail polish remover and a Q- tip/ cotton ball.

5. Apply top coat when your nails are dry. ***

6. Flash off your new nails! ( My nails look messy because I forgot to remove the excess nail polish and I used many coats of Essie nail polish which was very light.)

                                 Merry Christmas and Happy New Year!!!!  : D

Thursday, November 29, 2012

Swan Lake

               Hi, I know I haven't posted in a while because I have been busy, but I did make a project. It is a very easy one and you can make little tiny, simple ones or big, decorative ones.

  Okay, you need these! ( the * sign means optional )

Paper
Scissors
* Pencil/Pen*
*Eraser*


1. Gather all materials.


2. Fold the paper in half.
*3. Draw with a pencil/pen a half heart  on part of the folded paper.*


*4. Outline a swan. The heart is the front of the swan's neck, so the body starts around where the bottom of the heart ends.*


5. Cut out the outline of the swan, make sure to cut out the half heart shape out FIRST, ( from top or bottom) THEN  cut out the rest of the swan.


6. Unfold and you have a swan for some special/random occasion ( and a heart too!) ! Give it to your mom, teacher, friend, neighbor, anyone you can think of!


7. MOST IMPORTANT: Have Fun!!!

 See ya later!!! ;D

Saturday, November 17, 2012

Blog Chronicals! Jigglin' Jellys!!!

Hi,
       I haven't posted in a while, so I hope you still visit the blog!
Today we are making a soft,squishy, hug-able jellyfish! It might be a little hard for beginners so I will mark the steps that are optional with the * sign before the number and after the step . The steps that are easier for beginners will be marked with the # sign. This might take a few days if you have little time on  your hands or if you take a temporary trip to (as one of my teachers say) " La-La land". Thanks to the "Calico Cat", I bought almost all of my materials except tape* ,scissors, and yarn!This is there website in Hawaii!              http://www.thecalicocathawaii.com/  ( cut and paste. That was not a link.)

 You will need-
 Felt
Embroidery Needles ( the longest in the pack or the longest Embroidery Needle you have)

Embroidery Floss
Stuffing (Polyester, Cotton, Kapok, Bamboo stuffing- it is not the stick- , and the soft and classic; Wool. I bought my wool from the " Calico Cat", a fabric and quilting store)

 Sharpie Marker* #
Scissors
Yarn
Wool (for needle felting), the package will say needle felting*
Felting needles*
Bells*
Fabric ( any type) for a bow*

1. Gather materials
*2. Thread  your needle with the embroidery floss. Plan out how big you want the jellyfish to be. Mark the area with tape*
3. Cut the shape of the jellyfish out ; it will look like a half circle( cut around the tape). Peel off the tape on the top of the jellyfish.
4. Do a "whip stitch", or use the needle to go in,out, around, and repeat.( it will look like a old-fashioned leather pouch/purse.)
5.Sew ONLY the curved part/ top of the jellyfish. DO NOT SEW THE BOTTOM!!!
6. Cut yarn as long as you want  tentacles to be.Tie the very top of the yarn in a knot a couple of times so there is a thick knot at the top of each piece of yarn.
7. Insert one of the pieces of yarn into the bottom of the jelly so the knot is inside the jellyfish. You should only be able to see the long/short strand of yarn, no knots! Sew tightly AROUND the knots. Do not sew through the knot or else the fibers will separate.

8. When you have sewn the most of the area around the jellyfish, peel off some of the tape ( about 3/4 of the tape) and sew ONLY 3/4 of the jelly so it has 1/4 of the jellyfish covered in tape.
9. Stuff the jelly until very soft and fat so the felt has expanded a little.
10. Sew the rest of the jelly.
*#11. Use a Sharpie to draw in the face or details if you want to. A lot easier than the next steps...
* 12. If you know ( or have) how to use a felting needle(s) use  red wool -pink wool or any color wool that would look nice- to make blushing cheeks! <3 Use the felting needle to prick the wool over and over and over and over... Until the wool is embedded into the felt body of the jellyfishy!*
*13. Use a needle and thread to make the eyes by sewing a medium-sized oval in the jellyfish by coming in-and-out of the jellyfish; this is called  a running stitch. You can make this go by faster by grabbing some of the felt on the jellyfish and squeezing the felt together so the fabric is ruffled and stick your needle through. I call this the " cheating running stitch", but I do it anyway! When you pull out the needle, there will be about an average of about 3( based on me) stitches per         " cheating running stitch".*
*14. Make the mouth with a running stitch.I made an upside down triangle.*
*15. To make the bow, fold the fabric ( with felt or any fabric of your choice choice. I used a different fabric.) in half and use something like a clip to keep the fabric easier to use. Sew a triangle WITHOUT a point, don't sew the folded point. When you are done sewing a bow form( two triangles; don't sew either points on the triangles, you do NOT need to) cut the out outline  of the seams and you have a bow l><l ! *
*16. Sew the bell on the bow any way you want to. Sew the bow- with the bell on RING RING- on to the jelly.

I hope you like like this project and I think I might do one with wool. Hmmm... See ya later! Meow :D




Wednesday, November 7, 2012

3D drawing today- Blog chronicles; later


Okay, today I'll show you how to make a simple 3-D image.

You will need-
* two markers like pink and blue( I like using highlighters)
* a paper, I used line paper because that was the only paper I had.
* and a pencil and eraser for more complicated doodles ;D ( optional)

1. Gather materials.
2. Take out first high lighter/ marker, I did pink first so try the lighter colors first.
3. Draw the ( in my case, heart, but try heart first because it is simple) heart.
 4. Out line the color with your second color( do NOT trace the pink; outline it. It is fine to trace by accident.).
5. When your done, it should have a somewhat 3D appearance, or at least a cool look. I will be adding more crafts later so stay tuned! Next time in the Blog Chronicles; "A stuff-tacular time!"